
How to Encapsulate a Crawl Space
The Short Answer: Encapsulating a crawl space means sealing it off from the ground and the outside air. A contractor lays a heavy plastic liner across the dirt floor and up the walls, closes the foundation vents, and adds equipment to control moisture, usually a dehumidifier or a sump pump.
Done right, you get a dry, sealed space under your home. That prevents mold, wood rot, and structural damage, and it lowers your energy bills.
Here is what the job involves and how to keep the seal working long-term.
What is Crawl Space Encapsulation?
Encapsulation turns the bare, vented space under your house into a clean, sealed, dry room. Right now that space most likely has an exposed dirt floor and open vents in the foundation wall, which means soil dampness rises up and humid outside air blows in. Both leave moisture on your wood framing, and that moisture is what leads to mold, rot, and musty air upstairs.
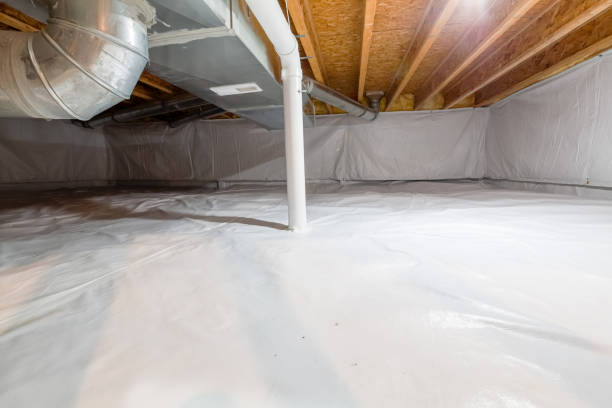
The fix is to wrap the whole space in a moisture barrier. A contractor covers the dirt floor with a thick plastic liner, runs it up the foundation walls, and tapes and fastens every seam so no ground moisture gets through. The vents get sealed shut, and the access door is replaced with an insulated one. From there, the space needs a way to stay dry for good, which is usually a dehumidifier, air from your home's heating and cooling system, or a small ventilation fan. If water actually pools under the house after rain, a drain and pump go in first, because a liner cannot seal out standing water.
What Are the Benefits?
A sealed crawl space does more than look better than a dirt floor and open vents. Because that space sits directly under your living area, whatever happens down there works its way up: the dampness, the temperature, and the air itself. Closing it off changes all three at once, so the payoff shows up on your energy bill, in the air you breathe, and in how long your framing lasts.
You'll notice more than a cleaner space:
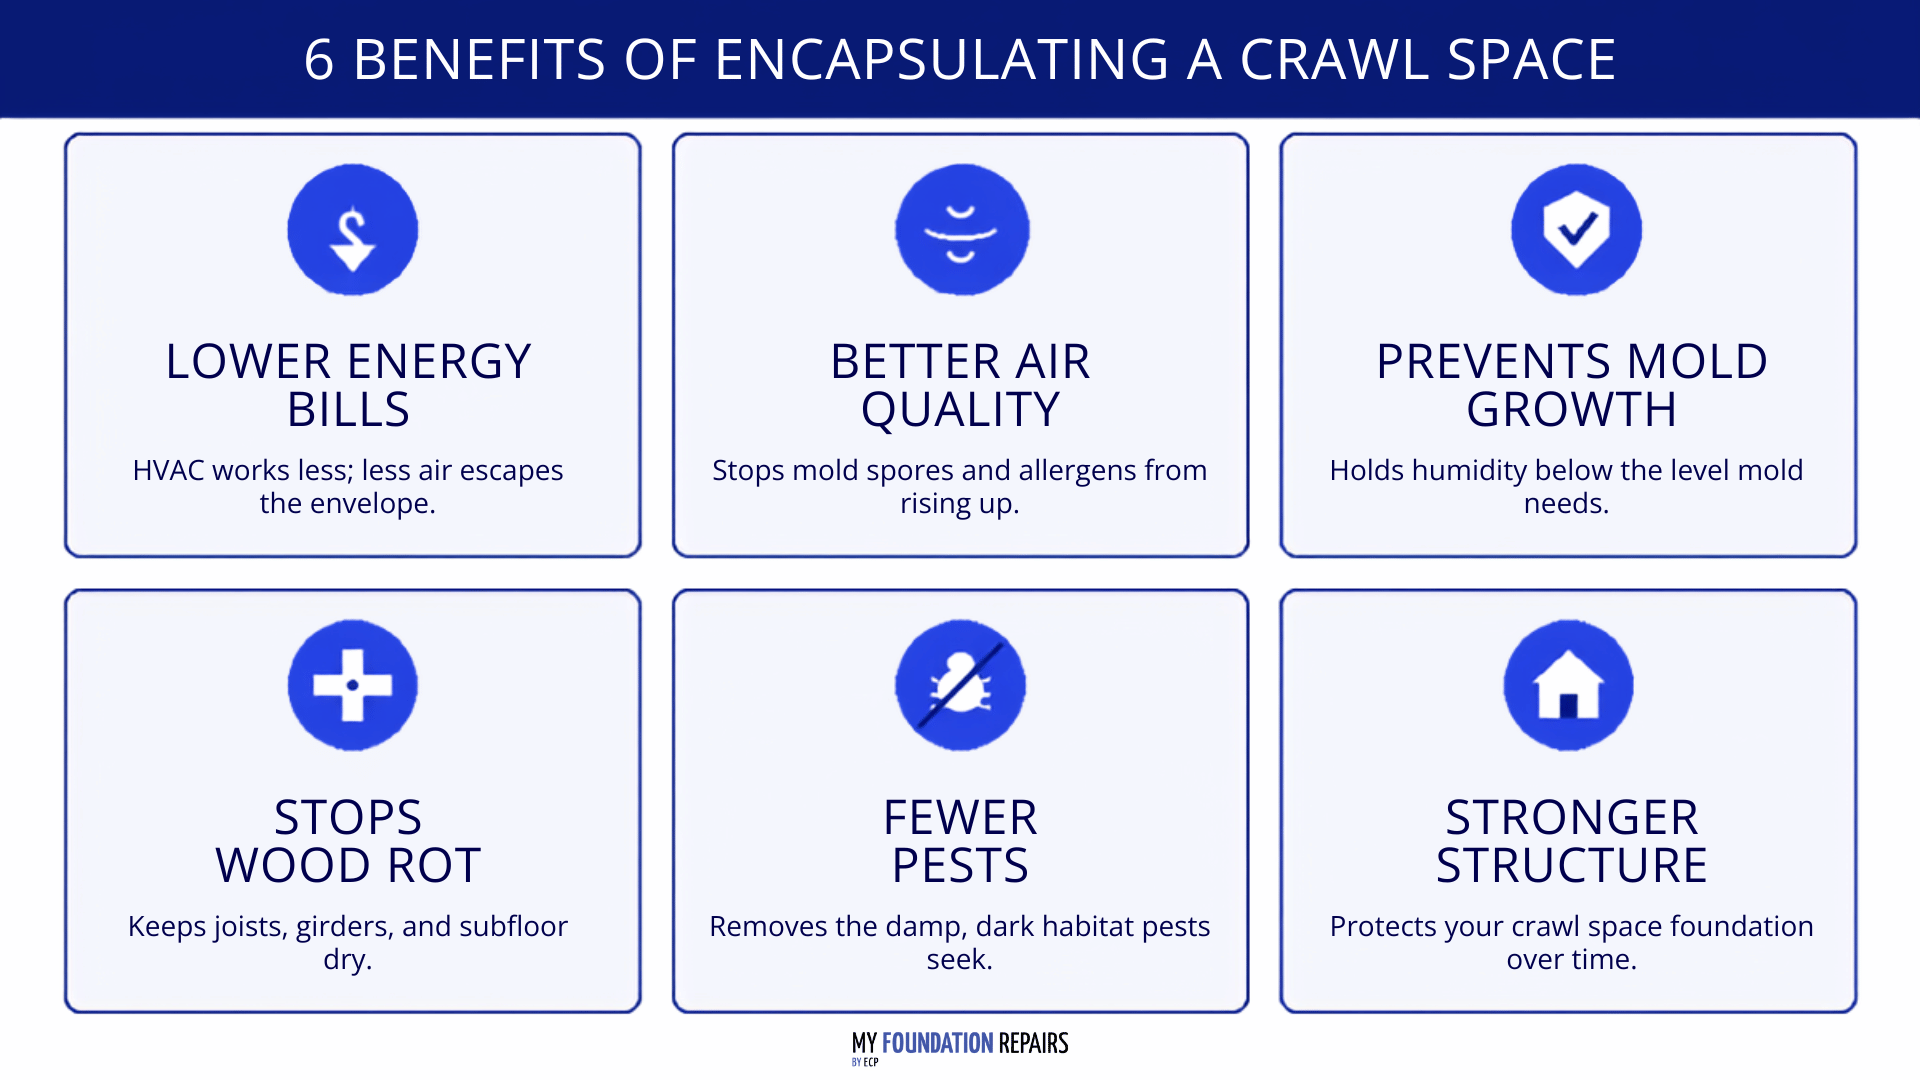
- Lower energy bills: Sealing the space brings it inside the part of your home your HVAC already heats and cools. The U.S. Department of Energy reports that sealed, conditioned crawl spaces cut heating and cooling energy use by 15 to 18 percent.
- Better indoor air quality: Air from below rises into your living space through gaps around plumbing and ductwork. Sealing the area keeps mold spores, allergens, and musty odor out of what you breathe upstairs.
- Long-term protection against mold growth: The EPA recommends keeping indoor humidity between 30 and 50 percent to limit mold and dust mites. A sealed system holds moisture levels in that range.
- Stronger structural integrity: Ground moisture and standing water rot floor joists, girders, and subflooring. Cutting the source of that dampness protects the wood framing and the crawl space foundation.
- Fewer pests: A dry, sealed area cuts off the damp, dark conditions that invite rodents, termites, and pest infestation.
If you're already dealing with water below your home, that issue needs to be fixed first. No seal will protect the area over standing water.
The Crawl Space Encapsulation Process
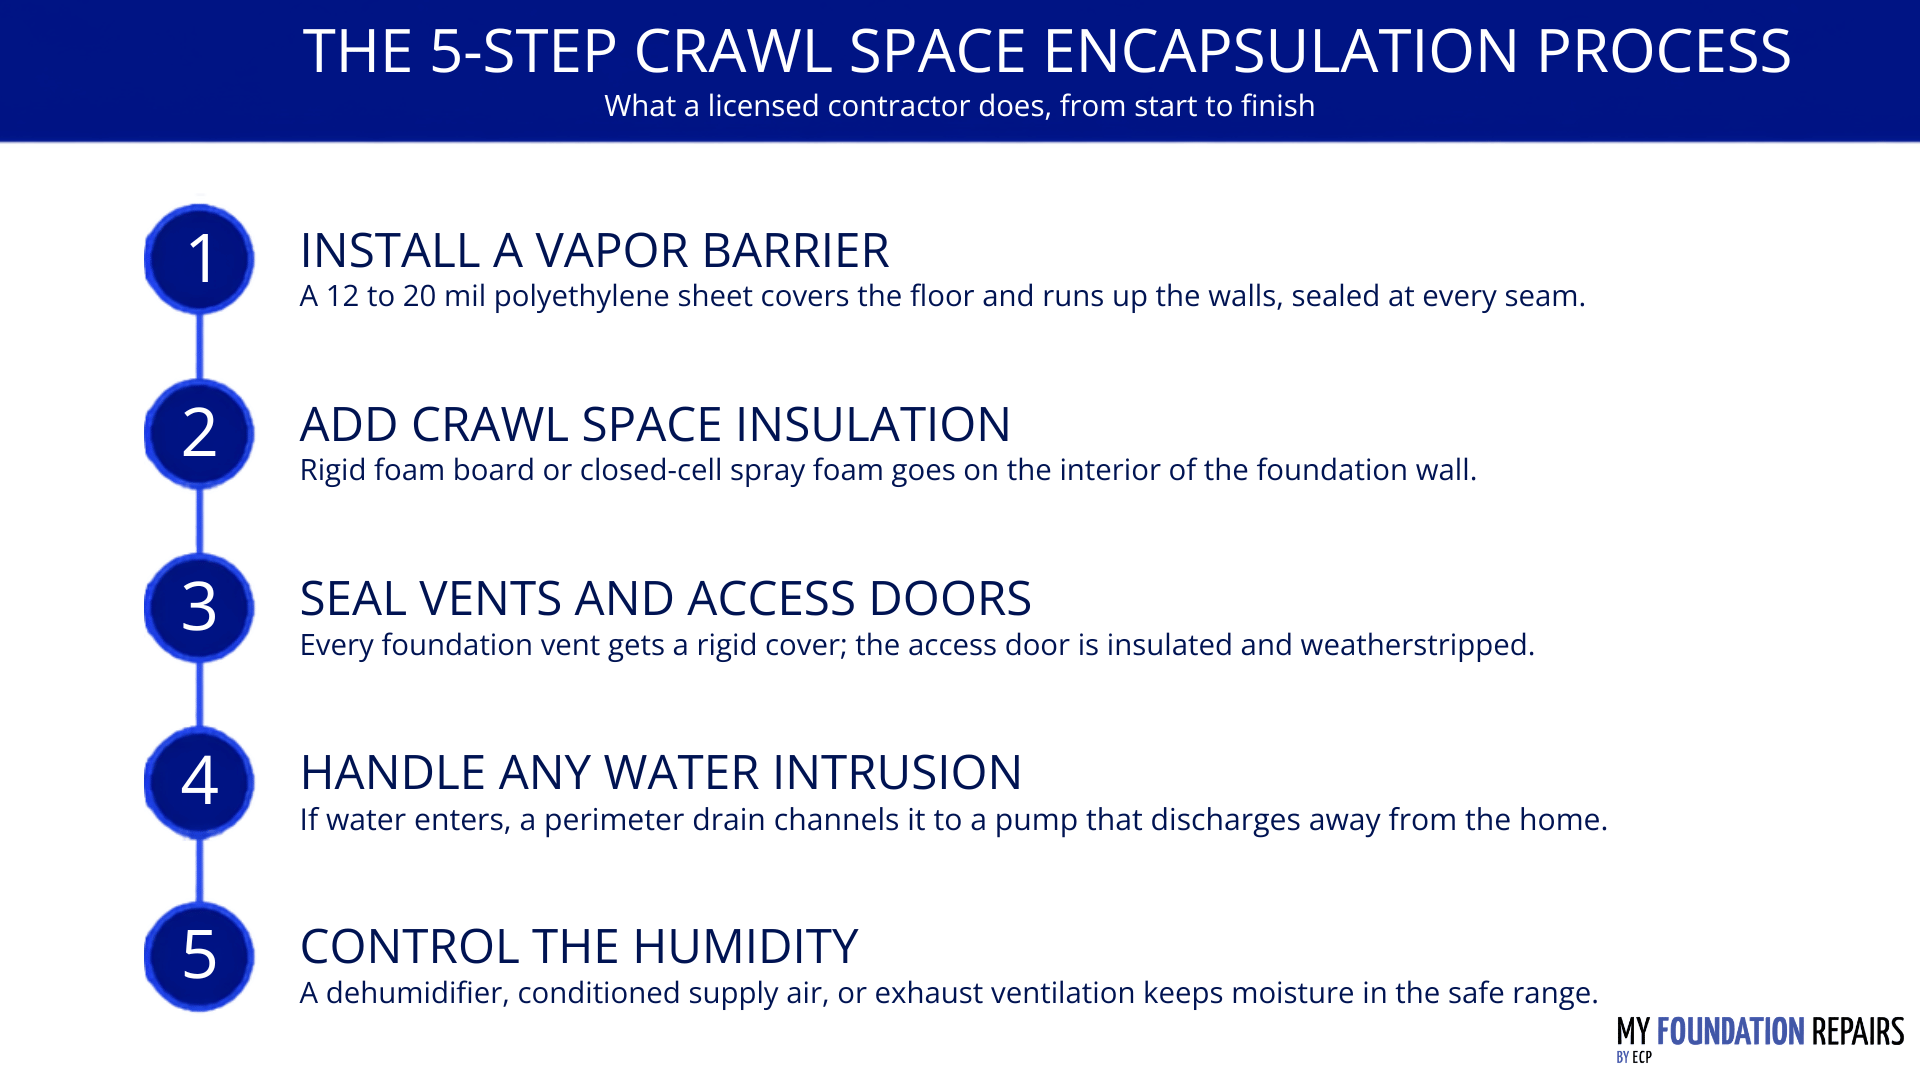
A full sealing job takes multiple steps: drying, insulating, and closing off the space. Skip a step or use thin materials and you'll often create a bigger moisture problem than the one you started with. A licensed contractor handles professional crawl space encapsulation end to end.
Here's what a full job typically includes.
1. Install a Vapor Barrier
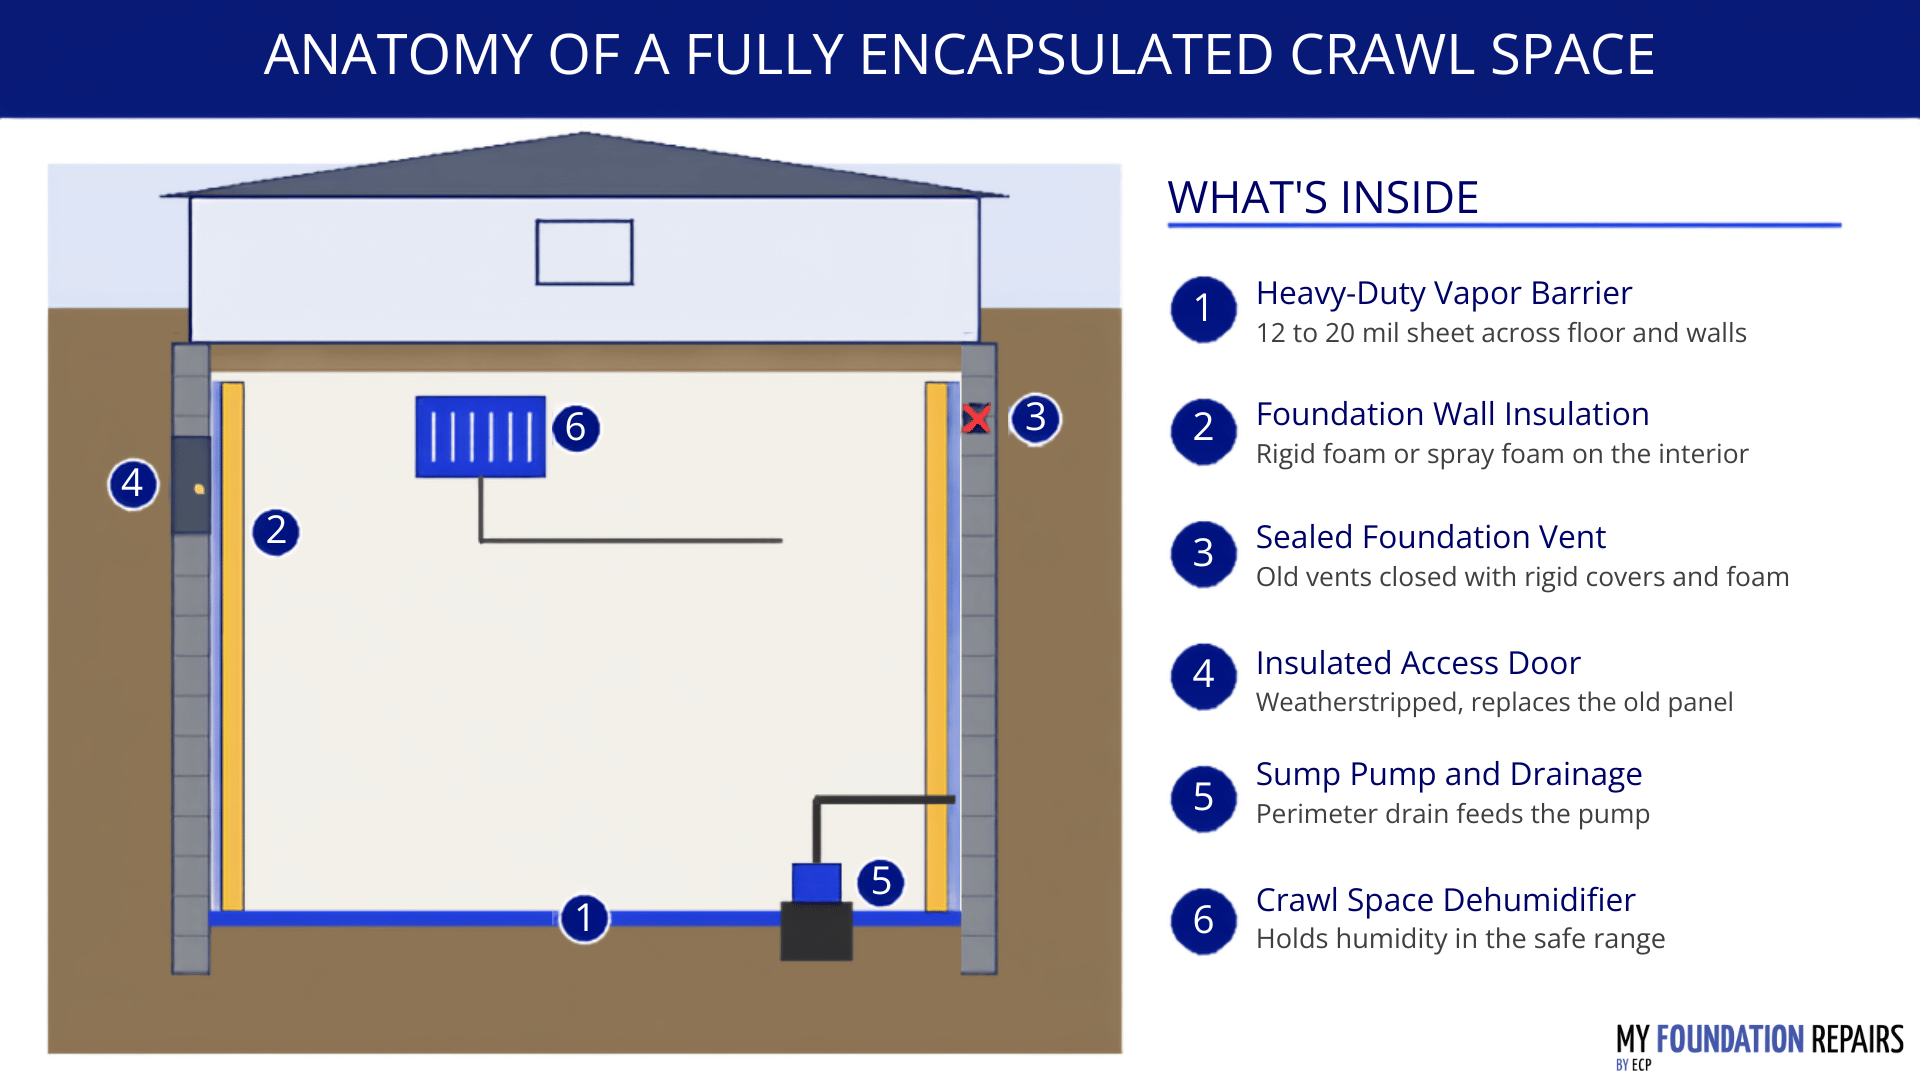
The liner is the core of any encapsulated crawl space. Contractors use a heavy-duty vapor barrier, usually a reinforced polyethylene sheet between 12 mil and 20 mil thick, to cover the dirt floor and run up the crawl space walls. Every seam gets taped, and the sheet gets mechanically fastened to the concrete foundation walls and support piers. A durable vapor barrier stops water vapor and rising damp from the soil, which is the biggest cause of moisture issues under most homes. A thinner 6-mil sheet works as a basic barrier for smaller jobs, but a full job calls for a much thicker encapsulation material for long-term protection.
2. Add Crawl Space Insulation
Once the liner is set, crawl space insulation goes on the inside of the foundation wall. Rigid foam board and closed-cell spray foam are both common because they hold up in damp conditions better than fiberglass. Spray foam also seals small gaps around the rim joist, cutting air leaks that push up your energy costs. Modern crawl space designs insulate the foundation wall instead of the subfloor, since that keeps ducts and plumbing inside the warm zone. Real energy savings show up across every season. The DOE Building America guide on unvented insulated crawlspaces has detailed specifications on materials and methods.
3. Seal the Crawl Space Vents and Access Doors
Older homes were built with crawl space vents so outside air could carry water out. In most climates, the opposite happens: humid air enters the cool space, condenses on framing, and drives up relative humidity. A full job closes every foundation vent with a rigid cover and foam sealant. An insulated, weatherstripped access door replaces the old vented panel. That combination stops the flow of outside air and holds the area at a stable temperature.
4. Address Drainage and Add a Sump Pump
If water enters during heavy rain or from a rising water table, no amount of sealing will fix the underlying moisture problem. A contractor addresses water intrusion before sealing, usually by installing a perimeter drainage system at the footing that channels water to a sump pump. The pump then discharges the water away from the home. In homes that flood often, a battery backup keeps the pump running through power outages.
5. Control Humidity in the Sealed Space
Once the space is closed off, it needs a way to manage moisture. Building code allows a few approaches: a dehumidifier sized for the square footage, a supply of conditioned air from the home's HVAC system, or continuous mechanical exhaust ventilation. A dehumidifier is the most common choice in humid climates because it works independently of the HVAC system. Your contractor picks the method based on your climate and how the home is already set up.
How Long Does Crawl Space Encapsulation Last?
A properly installed encapsulated crawl space can last many years before the liner needs replacement. Lifespan depends on the thickness of the liner, how well the seams were sealed, and whether the space stays dry. A tear in the liner, a failed sump pump, or a broken seal at the foundation wall can shorten that timeline.
Simple maintenance keeps the system working:
When a component fails, small problems grow fast. A torn liner lets ground moisture back in, humidity climbs, and wood rot and pest infestation follow soon after. Catch issues early, and you avoid mold remediation costs later. Crawl space encapsulation only pays off when the seal stays intact.
Get Matched with a Local Crawl Space Contractor
A sealed crawl space protects your home for decades, as long as it's installed correctly and any existing water problems are handled first. If you're seeing standing water, a musty odor, or signs of wood rot below your home, find a certified contractor in the My Foundation Repairs network for a free, no-obligation inspection. Every contractor in the network is vetted, insured, and trained to install the right system for your climate and your crawl space foundation. Have questions before you schedule an inspection? Contact the My Foundation Repairs team and we'll point you toward the right solution for your home.
Crawl Space Encapsulation FAQs
Cost depends on the size of the space, the thickness of the liner, and whether drainage or a sump pump is part of the job. Local labor rates and any cleanup or repair needed up front also move the price. Most contractors quote per square foot after an on-site visit. A local contractor is the fastest way to get an accurate number for your home.
You can lay a basic sheet over the dirt floor yourself, but a full job is best left to a professional. The barrier has to be fastened to the walls, the seams sealed correctly, the vents closed off, and a dehumidifier or drainage system worked into the system. A rushed DIY job usually traps water and causes more damage than it prevents.
Usually, yes. Closing off the space stops uncontrolled air leaks and cuts the humidity your HVAC has to fight. Many homeowners see their monthly utility costs drop after the job, especially in humid climates where the system had been working overtime to pull water out of the air.
Most of the time, yes. A musty smell upstairs almost always traces back to mold or mildew growing below the floor and drifting up. Cut off the dampness and control the moisture and the smell goes with it. If the smell sticks around after the job, existing mold may need to be removed before the seal can do its work.
A basic vapor barrier covers the dirt floor and blocks water vapor rising from the soil. Full encapsulation adds sealed walls, closed vents, insulation, and a dehumidifier on top of that. The extra steps give you stronger protection, better energy efficiency, and real defense against water getting in.